
Discover inspiring health and fitness tips tailored for moms. Embrace motivation, workout routines, and nutrition advice for a vibrant lifestyle.
Let’s talk hair! If you’ve ever considered making a big hair change, you know how exciting (and terrifying) it can be. Well, I’ve recently made a huge transformation, and today I want to share my experience of going from dark brown to blonde. Spoiler: it wasn’t a one-and-done process, but the results were absolutely worth it!
First, a little disclaimer: I started this journey with virgin hair—meaning I hadn’t colored or chemically treated my hair before this process. While I can speak to my own experience, it’s important to understand that this transformation can be very damaging to your hair, especially if you’re starting with darker hair and using bleach.
Bleaching can cause dryness, breakage, and damage if not done properly or with proper care. If you’re thinking of going blonde, please proceed with caution and always do plenty of research (and maybe consult with a professional). That being said, let me walk you through how I did it, the steps I took, and how I’ve managed to maintain my hair health throughout the process.
HiColor Blondes Permanent Hair Color H13
COLORCHARM Demi Permanent Hair Color 9NA
Wella Color Charm 10V (For Demi Permanent 9NA)
Wella Colorcharm 20V (For T27)
My natural hair color is a dark brown, level 4, and I was ready for a change. After spending a lot of time on Brad Mondo’s YouTube channel (seriously, this guy is a lifesaver if you’re looking to dye your hair yourself), I decided to take the plunge and lighten my hair to blonde.
Since I was starting with virgin hair, I knew the process would take time. I didn’t expect to go platinum overnight! Instead, I took a careful, step-by-step approach. Here’s how I did it:

The first step in the process was to lift my hair a level or so without using bleach. I used a hi-lift blonde color to start the process of lightening. This helped to gradually lift my hair without causing too much damage right off the bat. I wanted to ensure that I had a decent foundation before moving on to bleach, which can be much more aggressive on the hair.
This step helped my hair go from dark brown to a slightly lighter, medium brown shade, and I felt that it was a good base for the next phase.

After a few days to let the color settle, I went in with the bleach and foils. This part was scary! Bleaching your hair at home can be tricky, but I followed Brad’s tips and took my time. I used a Ion Creme Lightener and Wella 9A Demi-Permanent color. The Demi-Permanent color helped to tone down the brassy yellowish tones that can happen when bleaching. The bleach lightened my hair to a reddish-orange shade, which I was totally okay with since I knew it would get toned down later.
It’s crucial to be patient during this part of the process. I kept checking my hair as it processed and made sure not to leave it on for too long. Over-processing can cause major damage, and I wasn’t trying to end up with fried hair.


After the bleach round, I took a break and let my hair rest for a few weeks. This is so important when lightening your hair multiple times! Giving your hair time to recover helped prevent damage from getting worse. I did deep conditioning treatments during this time to nourish my hair and keep it as healthy as possible.
Remember, no rush here! This journey is about patience. If I could go back, I would also advise anyone to not try to do it all in one sitting. Lightening your hair should be done in stages to protect your hair from excessive damage.

After giving my hair a break, I was ready to go in for round two. This time, I focused on the top crown of my head, which hadn’t lifted as much as I’d hoped. I applied bleach to that section to get it up to a more even tone with the rest of my hair. After processing, I used Wella Color Charm T27 Natural Blonde to tone everything. Always foiling each piece.
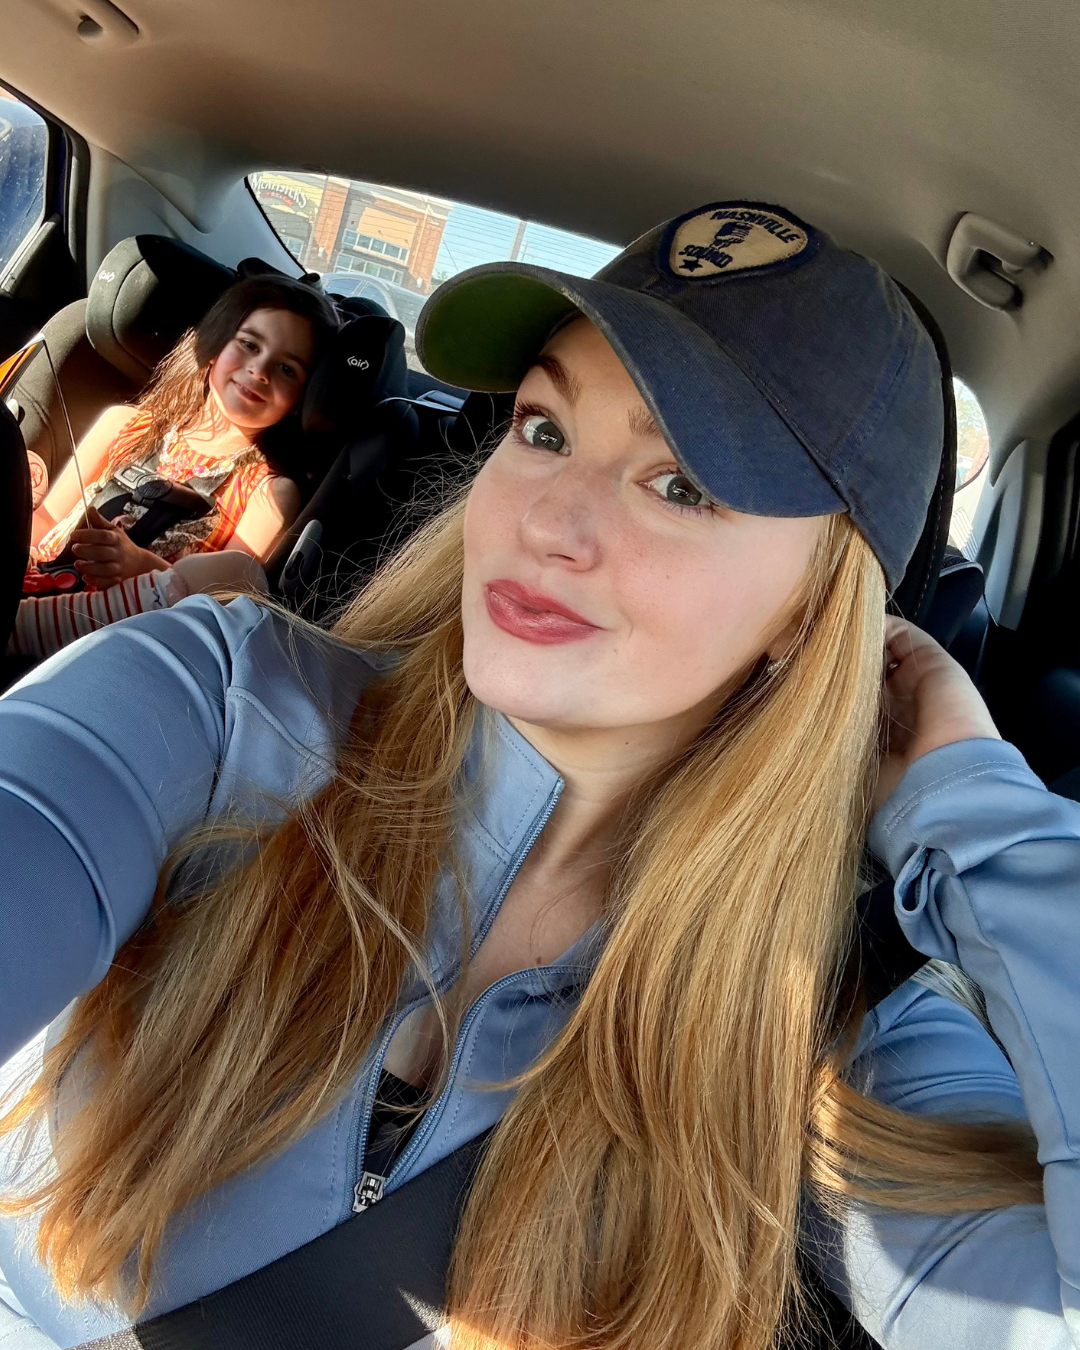
The T27 toner was amazing because it gave my hair a nice, neutral blonde without any harsh yellow tones. The result was a beautiful, natural blonde shade that blended well with the rest of my hair. I’m seriously so happy with the outcome!

Going blonde is a big commitment, but it’s also one of the most rewarding transformations I’ve made. My hair has never looked better, and I feel so confident with my new look. However, maintaining blonde hair is no easy feat, especially after all that bleaching!
Here’s a link to my Hair Care Routine that’s helped me keep my hair healthy and shiny, even after all that lightening. I’ve been using products that focus on hydration, strengthening, and toning, which is key when maintaining blonde hair. Purple shampoos, deep conditioning masks, and bond treatments are a must in my weekly routine. I don’t naturally have soft hair. It’s very dry and frizzy but I have nailed down a routine that FINALLY works for me and spent a lot of trial and error mastering it!

While the process wasn’t quick, and it did take a lot of time and care, I’m SO glad I did it. It’s important to note that I went in with virgin hair and didn’t have any previous color to lift, which did make the process easier. I still have to maintain my blonde, but so far, I’ve been really pleased with the results!
If you’re considering going blonde, take it slow, do your research (shoutout to Brad Mondo for the guidance), and give your hair the care it deserves. Blonde hair can be beautiful, but it’s also a lot of upkeep. So if you’re ready to make that commitment, go for it—but do it carefully.
Hair Care Routine: My Hair Care Routine: Keeping Bleached Hair Moisturized and Healthy
Thanks for reading my hair journey! If you have any questions or tips from your own blonde hair transformation, feel free to leave a comment below. 💛
Disclaimer: This post contains affiliate links, which means I may earn a small commission if you make a purchase through these links, at no extra cost to you. Thank you for supporting the site!